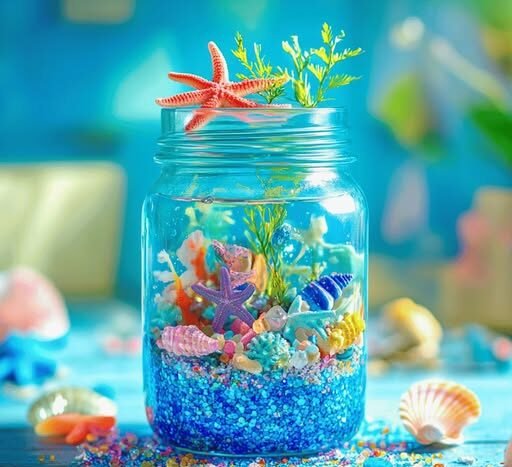
Here’s a recipe for a Mason Jar Aquarium Craft — a fun, easy, and creative project perfect for kids, classrooms, or home decor. This craft doesn’t use real water or fish but creates the illusion of a tiny underwater world using simple materials.
🐠 Mason Jar Aquarium Craft Recipe
🧰 Materials Needed:
| Item | Description |
|---|---|
| 1 Mason jar | Pint-sized works well (clear glass with lid) |
| Clear hair gel or hand sanitizer | Acts as “water” (transparent with some thickness) |
| Blue food coloring (optional) | For tinting the gel to look like water |
| Small plastic aquarium decorations | Mini sea animals, plants, shells, etc. |
| Blue aquarium gravel or sand | For the bottom of the aquarium |
| Glitter (optional) | For a magical, ocean sparkle |
| Hot glue gun (with glue sticks) | For securing items |
| Small plastic plants (optional) | Mini artificial plants for background decor |
| Ribbon or twine (optional) | For decorating the lid |
🧪 Step-by-Step Instructions:
1. Prepare the Jar
-
Clean and dry your mason jar thoroughly.
-
If the label is sticky, remove it completely for a clear view inside.
2. Add Gravel or Sand
-
Pour about 1 inch of blue aquarium gravel or sand into the bottom of the jar.
-
You can use a funnel or spoon to control the amount neatly.
3. Glue in Background Decorations (Optional)
-
Use a hot glue gun to attach small decorative items (e.g., coral or plants) to the inside of the jar’s walls or bottom.
-
Let it cool and harden completely before the next step.
4. Prepare the “Water”
-
In a bowl, mix clear hair gel or hand sanitizer with a tiny drop of blue food coloring.
-
Stir well to get a consistent ocean-blue look.
-
Add glitter for sparkle if desired.
5. Add the Gel to the Jar
-
Spoon or pour the gel into the jar slowly, over the gravel.
-
Fill the jar about 3/4 full to leave room for decorations.
6. Insert Sea Creatures
-
Add small plastic fish, sea turtles, starfish, or other sea-themed toys into the gel.
-
Use a stick or spoon handle to position them at different depths to create a 3D look.
7. Seal the Jar
-
Wipe off any gel on the rim of the jar.
-
Screw on the lid tightly.
-
Optionally, hot glue the lid closed for safety if kids will be handling it.
8. Decorate the Lid
-
Wrap the rim of the lid with ribbon, twine, or decorative tape.
-
Add a small label like “My Aquarium” or your name.
📝 Tips & Tricks:
-
No hot glue? Use strong craft glue, but allow extra drying time.
-
Using water instead of gel? You can, but it won’t suspend the fish/decorations the same way.
-
Want a nightlight? Place a battery-powered LED light in the lid (upside down) before sealing.
🎨 Craft Variations:
-
Glow-in-the-dark: Use glow glitter or small glow-in-the-dark fish.
-
Beach theme: Add tiny palm trees, sand, and shells.
-
Educational: Label fish species and ocean layers with stickers.
Would you like a printable version of this craft or a kid-friendly instruction sheet?