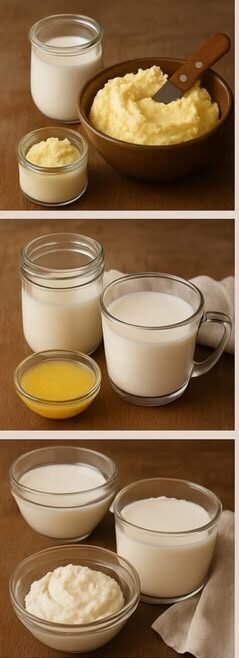
here are some easy recipes for homemade butter, heavy cream, and cream cheese. I’ll walk you through the ingredients and steps for each!
1. Homemade Butter
Ingredients:
-
2 cups heavy cream (preferably organic or fresh)
-
Salt (optional, to taste)
Instructions:
-
Chill the Mixing Bowl and Whisk: Start by chilling a large mixing bowl and whisk in the refrigerator for about 10-15 minutes. This helps to keep the butter colder and more solid while whipping.
-
Pour the Cream: Add the heavy cream to the chilled mixing bowl. You can also use a stand mixer or hand mixer for this process.
-
Whisk/Beat: Begin whisking on medium-high speed. After about 3-5 minutes, the cream will first turn into whipped cream. Keep going!
-
Butter Formation: Continue beating, and the whipped cream will begin to separate into butter and buttermilk. The butter will form clumps, and the buttermilk will separate out into liquid. This usually takes about 5-7 minutes after the whipped cream stage.
-
Strain the Buttermilk: Once the butter has formed, strain the buttermilk by pouring the mixture through a fine mesh strainer or cheesecloth. Keep the buttermilk for other recipes (like baking or pancakes).
-
Rinse the Butter: Put the butter back into the bowl and add cold water (about 1/2 cup). Use your hands or a spatula to knead and rinse out any remaining buttermilk. This step helps the butter stay fresh longer. Repeat until the water runs clear.
-
Season: If you like salted butter, add salt to taste. Start with about 1/2 teaspoon and adjust from there.
-
Store: Store your homemade butter in an airtight container in the fridge. It will last for about 1-2 weeks, or you can freeze it for up to 6 months.
2. Homemade Heavy Cream (Whipping Cream Substitute)
If you don’t have heavy cream on hand, you can make a substitute that works for most recipes.
Ingredients:
-
3/4 cup whole milk
-
1/4 cup unsalted butter (melted)
Instructions:
-
Melt the Butter: In a small saucepan, melt the butter over low heat. Allow it to cool slightly before mixing.
-
Combine with Milk: In a mixing bowl, combine the melted butter with the whole milk. Whisk together until fully incorporated.
-
Use as Needed: You can use this mixture in place of heavy cream for cooking, baking, or whipping. While it won’t whip up the same way as heavy cream, it works in most recipes.
3. Homemade Cream Cheese
Making cream cheese at home requires a bit more time, as it involves culturing the milk to develop the tangy flavor.
Ingredients:
-
4 cups whole milk (preferably not ultra-pasteurized)
-
1/4 cup heavy cream (optional, for extra creaminess)
-
2 tbsp white vinegar or lemon juice
-
1/4 tsp salt
-
1/2 cup plain yogurt (as a starter culture) or 1/4 tsp mesophilic starter culture (for a more traditional method)
Instructions:
-
Heat the Milk: Pour the milk and heavy cream (if using) into a saucepan. Heat it over medium heat, stirring occasionally, until it reaches 180°F (82°C). This helps to denature the proteins, ensuring a smooth cream cheese.
-
Cool the Milk: Let the milk cool down to about 110°F (43°C). You can speed this up by placing the saucepan in a cold water bath (but don’t get the water into the milk).
-
Add the Culture: Once the milk has cooled, add your yogurt or mesophilic starter culture. Stir it gently to combine. If you’re using vinegar or lemon juice (as a shortcut), add it at this stage.
-
Incubate: Cover the saucepan with a lid or a clean towel and let it sit in a warm place (around 70°F/21°C) for 12-24 hours. The longer it sits, the tangier the cream cheese will be. After this incubation period, the milk should have thickened to a yogurt-like consistency.
-
Strain the Curds: Pour the cultured milk into a cheesecloth-lined strainer or nut milk bag over a bowl. Let it drain for 6-8 hours or overnight in the fridge. The longer it drains, the thicker your cream cheese will be.
-
Season: Once it has drained and thickened, transfer the cream cheese to a bowl. Add salt to taste and mix well. You can also blend it to make it smoother.
-
Store: Transfer the cream cheese to a clean container and store it in the fridge. It will last about 1-2 weeks.
Notes:
-
Butter: Homemade butter can sometimes have a slightly different texture than store-bought, especially if you use raw cream, which gives it a richer flavor.
-
Heavy Cream Substitute: This homemade version works well for most dishes, but if you need whipped cream, it won’t hold its shape quite as well as the store-bought version.
-
Cream Cheese: If you prefer a thicker, spreadable texture, you can hang the cheesecloth with the curds over the sink to drain for a longer period.
Let me know if you need any other recipes or tips!
