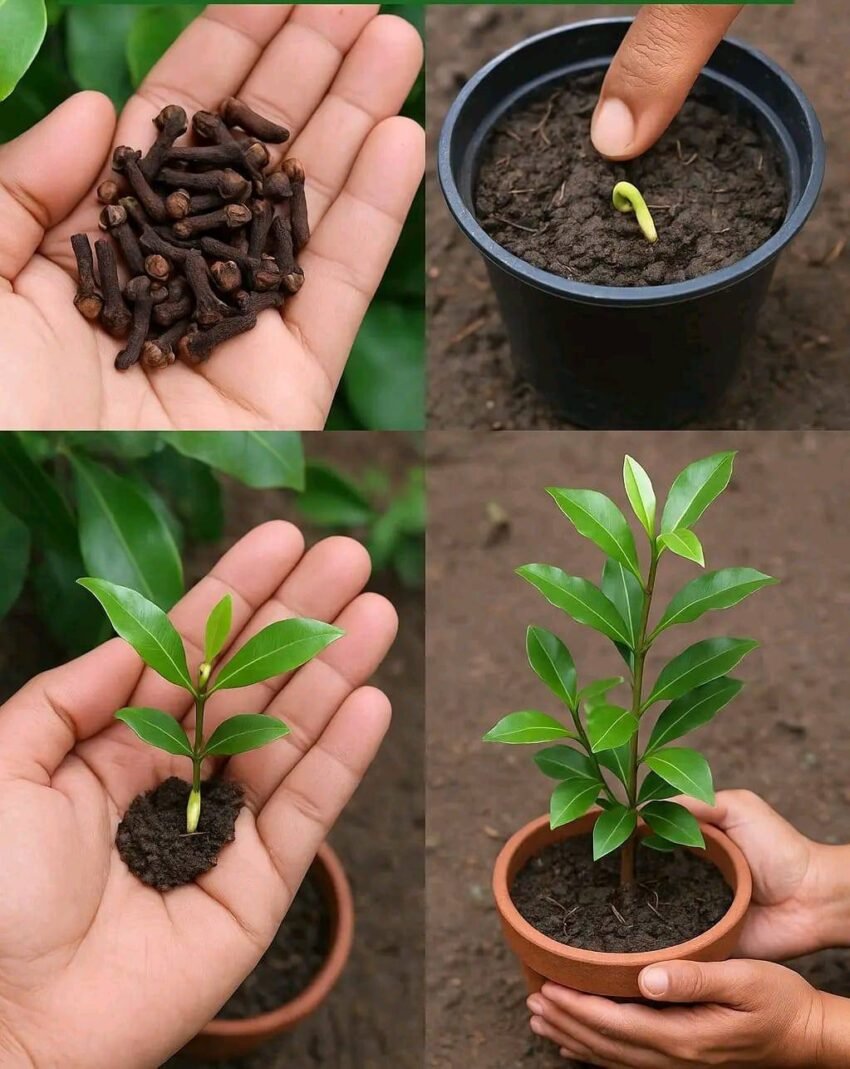
Growing a clove plant at home is a unique and rewarding project because cloves are usually grown in tropical regions and need specific conditions to thrive. Here’s a detailed unique way to grow a clove plant at home, blending traditional methods with some modern twists to boost success and make it fun.
Unique Way to Grow a Clove Plant at Home: Step-by-Step Recipe
What You Need:
-
Clove seeds (fresh and viable)
-
Seed starter mix (a blend of coco peat, compost, and sand)
-
Small pots or seed trays
-
Plastic wrap or humidity dome
-
Well-draining potting soil (rich in organic matter)
-
Large pot or planter (for transplanting)
-
Humidity tray or pebble tray
-
Spray bottle
-
Grow lights or sunny windowsill
-
Natural antifungal treatment (e.g., cinnamon powder or neem oil)
Step 1: Preparing the Clove Seeds
-
Get Fresh Clove Seeds: Clove seeds have a short viability period. Use fresh seeds from reliable sources or specialty nurseries.
-
Pre-soak Seeds: Soak the seeds in warm water for 24 hours to soften the seed coat and improve germination.
-
Natural Treatment: After soaking, sprinkle a little cinnamon powder on the seeds or soak them briefly in a neem oil solution (diluted) to prevent fungal infections.
Step 2: Seed Sowing – The Unique Germination Chamber
-
Use a seed starter mix: Mix coco peat (for moisture retention), compost (for nutrients), and sand (for drainage) in equal parts.
-
Planting: Sow seeds 1-2 cm deep in seed trays or small pots filled with this mix.
-
Humidity Dome: Cover the pots/trays with a plastic wrap or use a clear humidity dome. This creates a mini-greenhouse effect, maintaining high humidity and warmth, crucial for clove seed germination.
-
Temperature: Keep the setup at a warm temperature around 25-30°C (77-86°F). Use a heat mat if necessary.
Step 3: Watering and Care During Germination
-
Use a spray bottle to mist the soil surface regularly; avoid overwatering.
-
Keep the soil moist but not soggy.
-
Check daily to prevent mold. If mold appears, lightly sprinkle cinnamon powder on soil surface.
-
Germination can take 2-3 weeks.
Step 4: Seedling Care & Unique Nutrient Boost
-
Once seedlings emerge and grow a couple of leaves, carefully transplant them into small pots with rich, well-draining potting soil.
-
Unique nutrient boost: Feed seedlings every 2 weeks with a diluted fish emulsion fertilizer or homemade compost tea to encourage healthy growth.
-
Keep the seedlings in indirect sunlight or under grow lights for about 6-8 hours daily.
Step 5: Transplanting to a Large Pot or Garden
-
When seedlings are 6-8 inches tall, transplant them into a large pot or garden bed with rich, acidic to neutral soil (pH 5.5 to 7.5).
-
Add organic compost to the soil before planting.
-
Ensure the pot or garden spot is sheltered from strong winds and receives filtered sunlight or partial shade, mimicking natural tropical understory conditions.
Step 6: Maintaining Your Clove Plant
-
Watering: Keep soil consistently moist but well-drained.
-
Humidity: Clove plants love humidity. Use a pebble tray with water under the pot or regularly mist the leaves.
-
Pruning: Trim to shape and encourage bushier growth after the plant is established.
-
Pests: Watch for common pests like spider mites; use neem oil spray as a natural remedy.
Step 7: Patience & Harvest
-
Clove plants are slow growers and can take 3-4 years to start flowering.
-
The flower buds, which are the cloves, are harvested just before they bloom when they turn pinkish.
-
Harvest by hand, dry the buds in a shaded area, and store them in an airtight container.
Bonus Unique Tips:
-
Indoor Tropical Microclimate: Create a mini tropical environment by placing your clove plant near a small humidifier or in a terrarium-like setup.
-
Companion Planting: Grow your clove with other tropical herbs like lemongrass or basil to improve soil conditions and reduce pests naturally.
-
Use Aromatherapy: Place dried cloves near your plant to encourage growth and keep pests away (cloves naturally repel some insects).